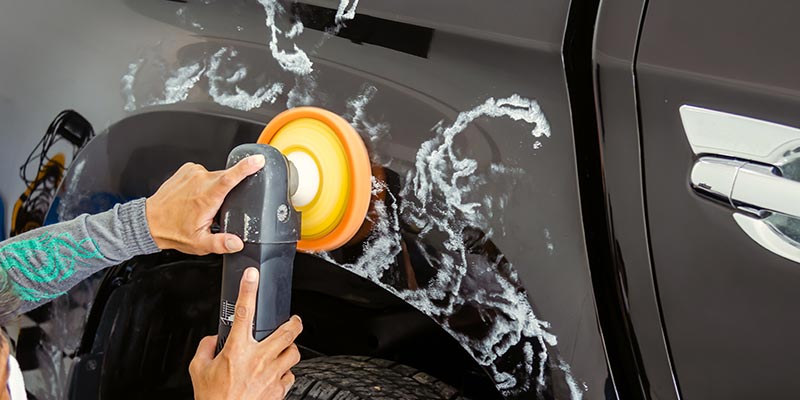
Car scratches are inevitable, whether they are caused by a stray shopping cart, a branch brushing against your vehicle, or simply from the wear and tear of daily use. Instead of heading to a professional auto repair shop, you can fix minor scratches yourself at home with the right tools and techniques. This article will guide you through the process of how to fix a car scratch at home, saving you both time and money.
Table of Contents
Understanding Different Types of Car Scratches
Before diving into the repair process, it’s crucial to understand the types of scratches you might encounter. Scratches are generally categorized into three types:
1. Surface Scratches (Clear Coat Scratches)
These are light scratches that affect only the clear coat layer, which is the topmost layer of your car’s paint. Surface scratches are typically easy to fix and don’t require extensive repair work.
2. Paint Scratches
Paint scratches go beyond the clear coat and affect the colored paint of your vehicle. These scratches might require additional touch-up paint to restore the original finish.
3. Deep Scratches
Deep scratches go all the way down to the metal or plastic body of the car. These are more challenging to repair and may require professional help, as they can lead to rusting if left untreated.
Tools and Materials Needed to Fix a Car Scratch at Home
Before you start, gather the following materials:
- Car Scratch Repair Kit (contains rubbing compound, polishing pad, etc.)
- Touch-Up Paint (matched to your car’s color)
- Microfiber Cloth (for cleaning and buffing)
- Rubbing Compound (to remove minor scratches)
- Polishing Compound (for a smooth finish)
- Masking Tape (to protect surrounding areas)
- Sandpaper (for deeper scratches)
- Car Wax (to seal the repair)
How to Fix a Car Scratch: Step-by-Step Guide
Step 1: Clean the Scratched Area
Before repairing the scratch, clean the affected area to remove any dirt, dust, or debris. Use soap and water, followed by a clean microfiber cloth to dry the surface. This step ensures that no contaminants interfere with the repair process.
Step 2: Assess the Depth of the Scratch
Carefully examine the scratch to determine how deep it is. If it’s a surface scratch (just affecting the clear coat), you can proceed with a rubbing compound. For deeper scratches that go into the paint, you may need touch-up paint or sanding.
Step 3: Sand the Area (If Necessary)
For deeper scratches that have penetrated the paint, use fine-grit sandpaper (2000-grit or finer) to gently sand the area. Wet the sandpaper and use circular motions to smooth out the damaged surface. Be careful not to sand too hard, as you don’t want to damage the surrounding paint.
Step 4: Apply Rubbing Compound
For minor scratches, apply a small amount of rubbing compound to the scratched area. Using a microfiber cloth, gently buff the area in circular motions. The rubbing compound will help to remove the scratch by smoothing the surface and removing any debris or excess paint.
Step 5: Touch Up the Paint (If Needed)
If the scratch has affected the paint layer, it’s time to apply touch-up paint. First, make sure that the paint matches your car’s color by checking the vehicle’s color code, typically found on a sticker inside the driver’s side door. Apply the touch-up paint in thin layers using a small brush or applicator. Allow each layer to dry before applying another coat.
Step 6: Polishing the Area
After the touch-up paint has dried, use a polishing compound to buff the area. This step smooths out any imperfections and gives the area a shiny finish. Apply the polish using a clean microfiber cloth, and buff in small circular motions until the area blends seamlessly with the surrounding paint.
Step 7: Apply Wax to Protect the Repaired Area
Once you’ve finished the scratch repair, apply a coat of car wax over the entire affected area. The wax acts as a protective layer, helping to seal the paint and restore the vehicle’s glossy finish.
Additional Tips for Maintaining Your Car’s Paint
- Regular Washing: Keep your car clean by washing it regularly to prevent dirt from scratching the paint.
- Protective Film: Consider applying a protective clear film to vulnerable areas, such as the front bumper, to reduce the risk of future scratches.
- Avoid Parking Near Trees: Parking under trees can expose your car to branches and leaves that may cause scratches.
Conclusion
Fixing a car scratch at home is a manageable task with the right tools and techniques. By following this step-by-step guide, you can restore your car’s finish and save on expensive repairs. Remember that the success of the repair depends on the severity of the scratch—light scratches can usually be fixed at home, while deeper ones may require professional attention. Regular maintenance and care will help keep your car looking great for years to come.


/seedandhome-desk-39777dc8d0a647459eb117247aa402e0.jpg)
